Set Up Your Facebook Pixel Using Google Tag Manager [Guide]
What is the Facebook Pixel?
For every Facebook ad account, you can create and set up a Facebook Pixel using Google Tag Manager.
The Facebook Pixel can provide multiple benefits such as:
- Capturing site visitor data
- Build retargeting lists
- Track standard & custom events & conversions
- Build lookalike audiences (audience expansions)
Provide people based reporting through Facebook Analytics[No longer available as of July 1, 2021]
Prior to diving into the actual implementation let’s explore in further detail the benefits of the Facebook Pixel and Google Tag Manager.
Why you should you use the Facebook Pixel
There are many reasons to use the Facebook Pixel here are a few:
Qualified Audience Expansion – You can build lookalike audiences off of specific site visitors or visitors that converted in the past which allows you to expand your reach outside of your particular audience targets.
Custom conversion tracking – You can create predefined standard conversions, i.e., leads or purchases or generate any custom conversion that is a crucial action to track.
Note: Conversions are essential for direct response campaigns since these will be used by the Facebook to optimize against specific conversion objectives.
Furthermore, Facebook tracks conversions across people without the limitations of cookie-based tracking that exists within Google Analytics.
You can read more in my blog post talking about the difference between Facebook Pixel vs Google Analytics Conversions.
Retargeting – Retargeting when executed correctly can be a powerful tactic to close sales, drive leads or have a user complete a specific action.
Facebook Pixel Analytics – The Facebook pixel gives you people based attribution insights based on users that visited your site.
What is the Google Tag Manager
The Google Tag Manager is a container you can install on your website that houses all of your tracking and analytics JavaScript and HTML tags. Such as setting up the Facebook pixel using Google Tag Manager.
Why use GTM (Google Tag Manager)
As a marketer speed and flexibility is key in executing, tracking, optimizing and reporting on digital campaigns.
Having a tag management system makes this possible.
As a result, all tracking code can be implemented quickly without the need for developers and developer timelines.
In addition since the Google Tag Manager Cost is free makes this choice a no-brainer 🙂
Note: Given these points, it might be worth the effort to move the Facebook pixel to google tag manager.
Step by Step: How To Install The Facebook Pixel via Google Tag Manager
To successfully install the Facebook Pixel you will need to take the following steps:
- Create the Facebook Pixel
- Create a custom HTML Tag in the Google Tag Manager
- Deploy the Facebook Pixel via GTM
- Send test traffic to for validation
- Create Standard events
- Create Custom events
Ok, so let’s get started.
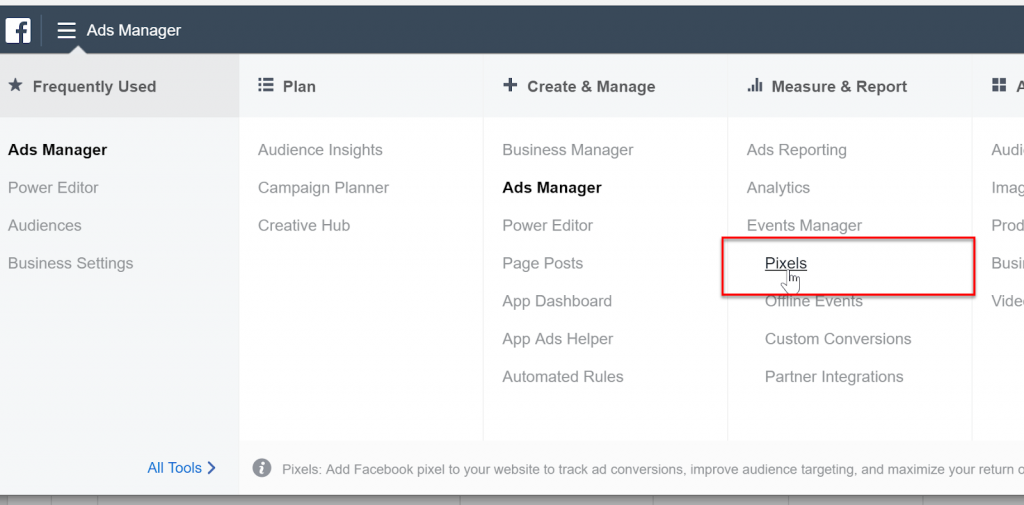
To set up the Facebook pixel expand the top left hamburger menu in the Ads Manager and click Pixels.
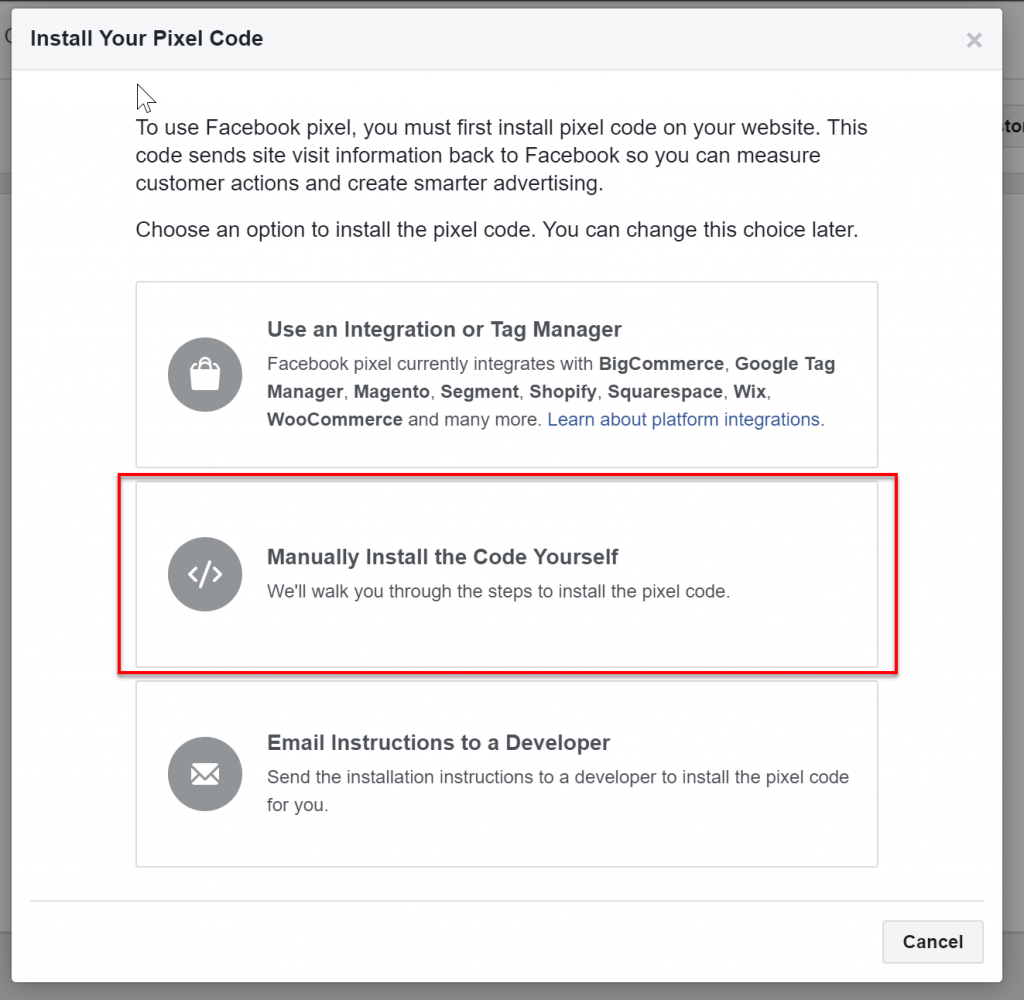
Click set up a new pixel and select Manually Install the Code Yourself.
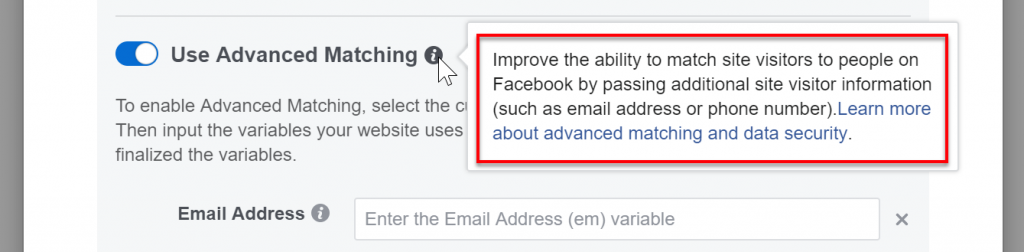
Note: If you are collecting site visitor email, zip or phone number you can use Advanced Matching.
Advanced Matching passes these fields as hashed values to the Facebook pixel for improved people matching.
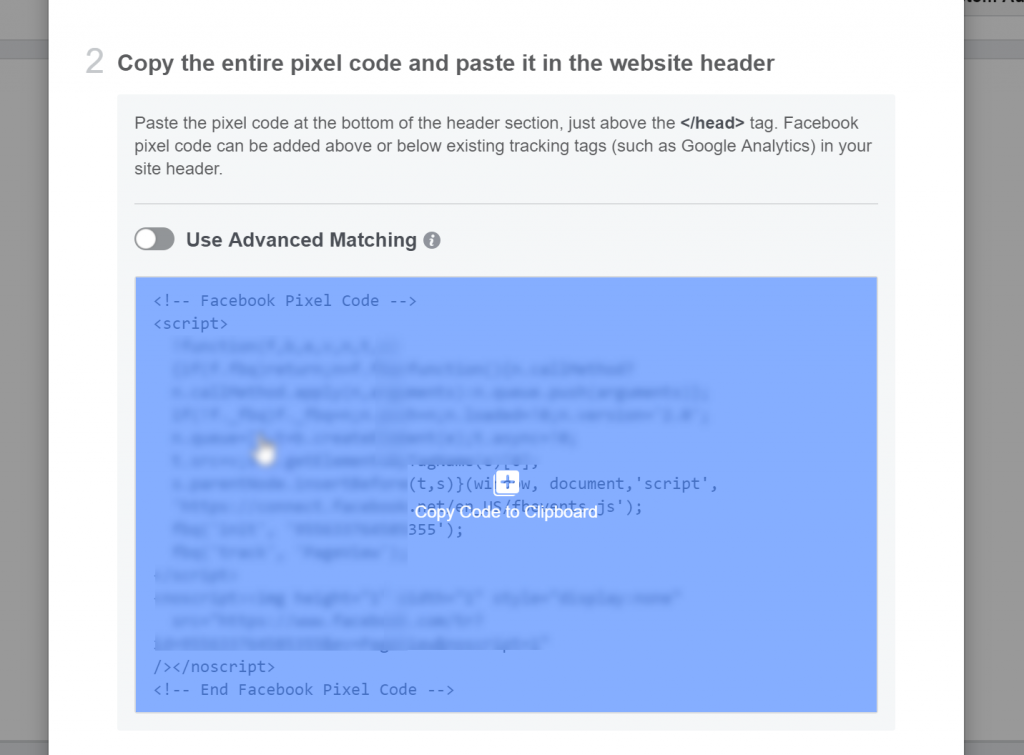
Move right to the second step and copy the Facebook pixel.
Google Tag Manager Set Up
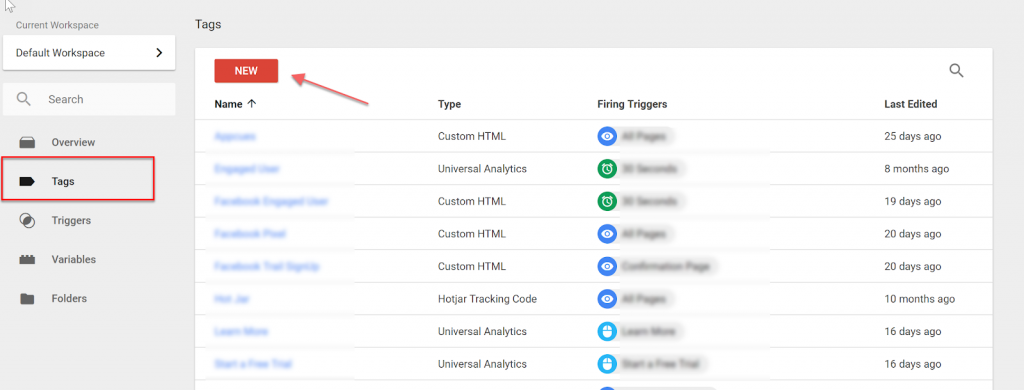
In the Tag Manager under Tags click New
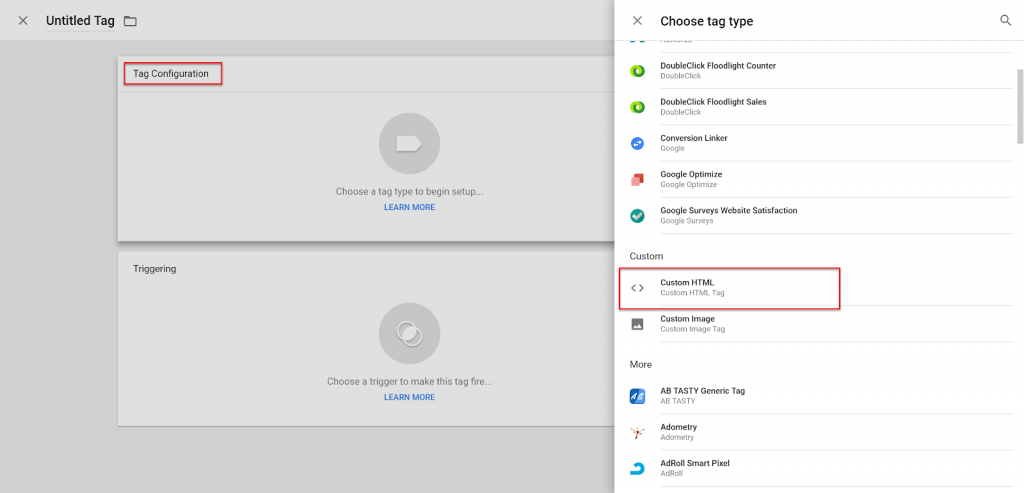
Under Tag Configuration select Custom HTML
Paste the pixel you copied earlier into the HTML tag. You can remove the static pixel since no script tags will not fire within an HTML tag.
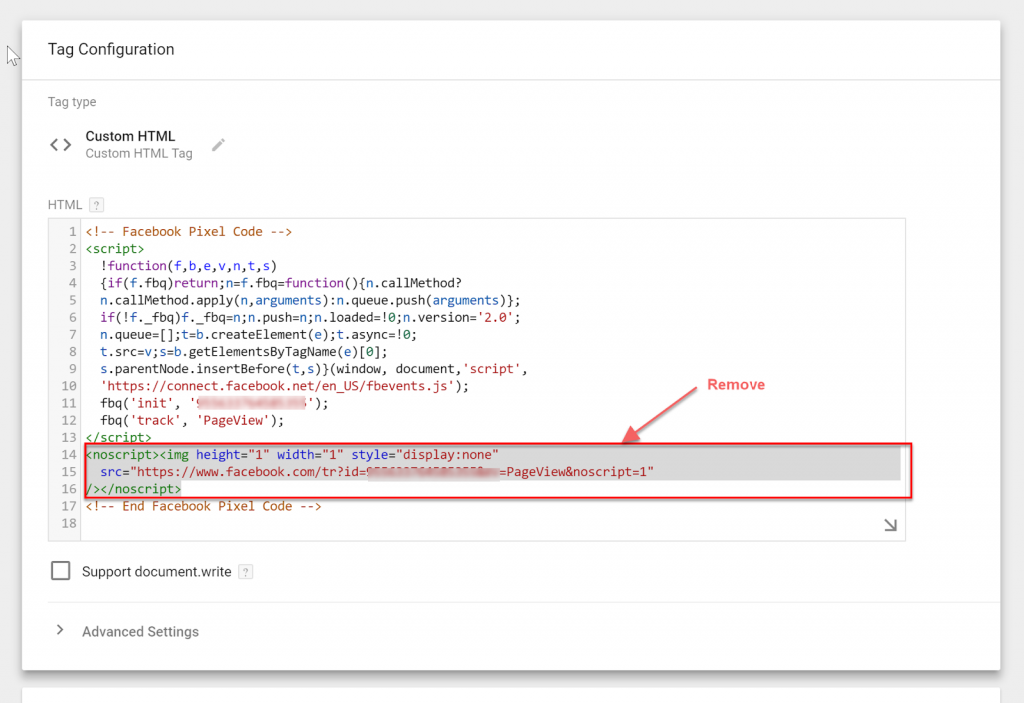
Note: If you do want to install the static pixel for Javascript disabled browsers you can create a custom image tag that has a trigger set to only fire on javascript disabled browsers HT
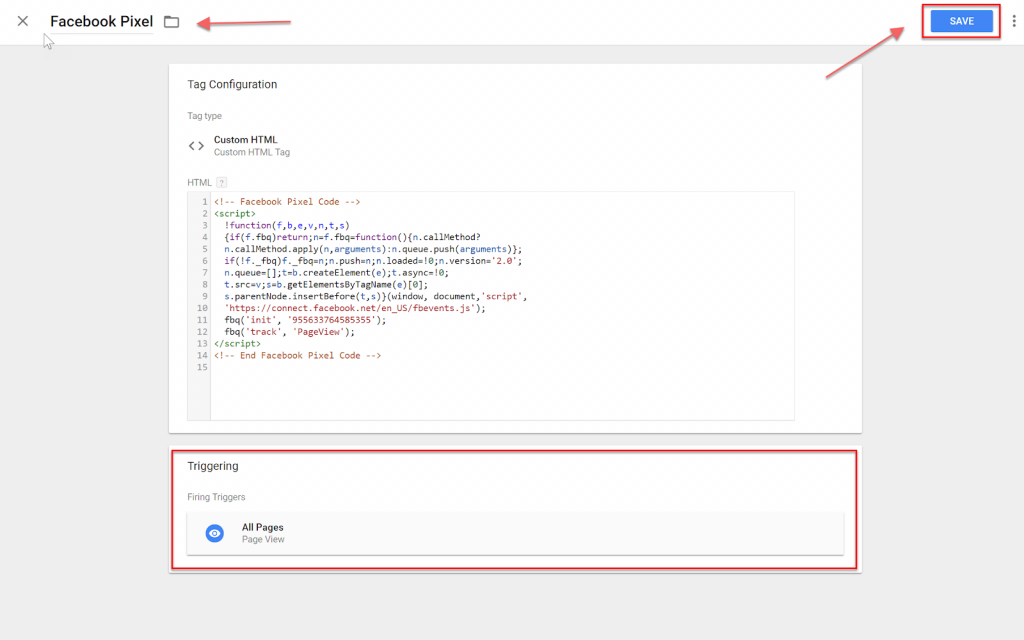
Set the Pixel to fire on all pages give it a descriptive name and click save.
Now that the pixel is set up go back to Facebook Ads Manager and paste in your website URL to send test traffic to your pixel.
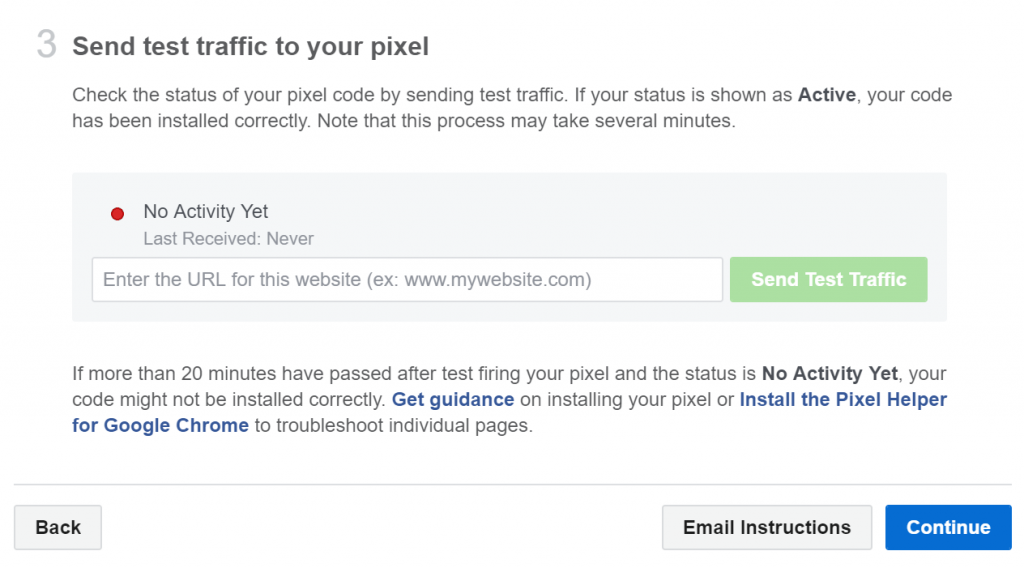
If everything looks good click continue.
Setting up the Facebook Pixel Event Via Google Tag Manager
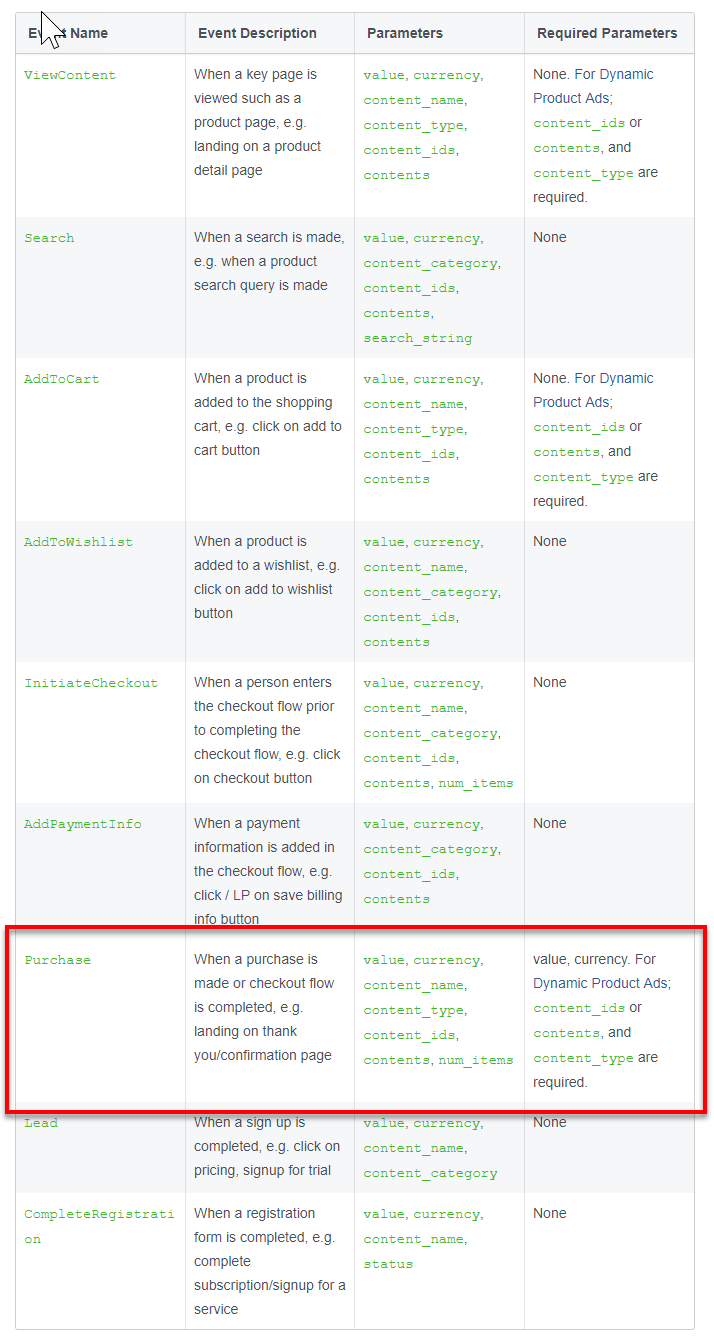
Facebook provides nine standard events with predefined parameters associated with each one.
In this case, I am going to cover setting up a Facebook Standard Event (Purchase) and a Custom Event using the Google Tag Manager.
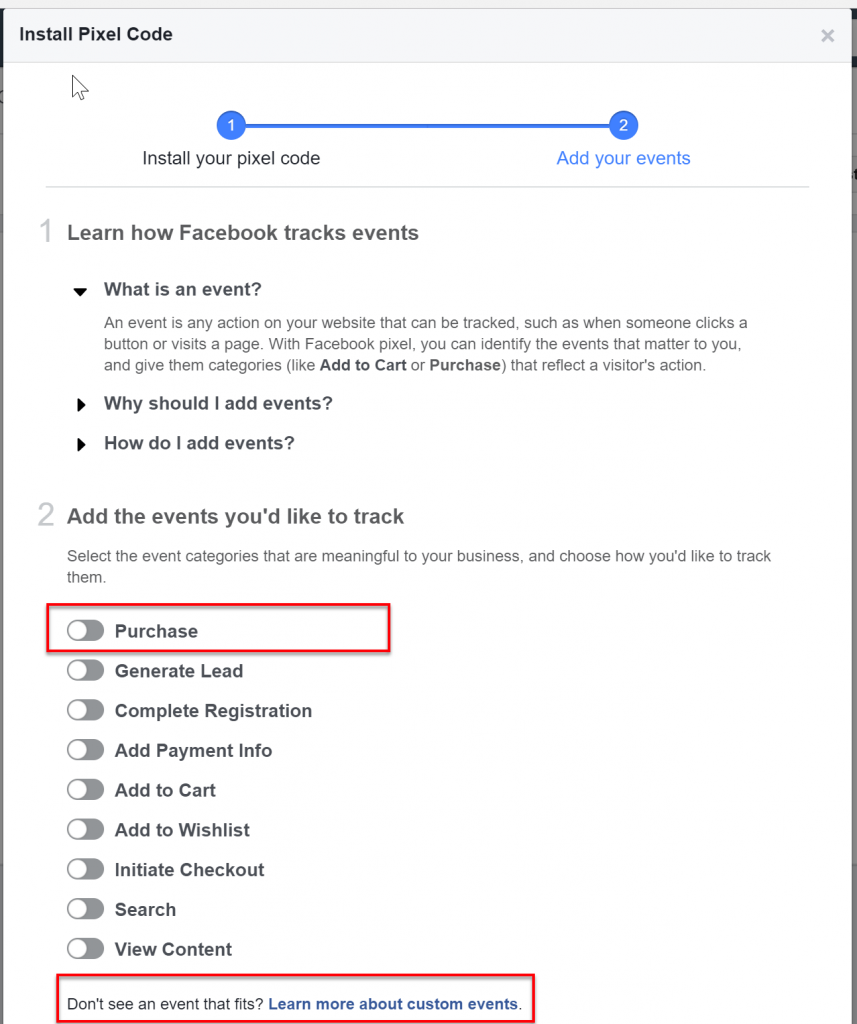
After having verified the pixel installation, you should see the next step with an option to select an event you would like to track.
Once you have selected the Purchase Event, we need to pass information to at least three variables dynamically.
Conversion Value – Total transaction value
Currency – Transaction currency
Content ID – You can pass transaction ID or product IDs. For dynamic product ads, the product IDs would have to match your catalog feed IDs.
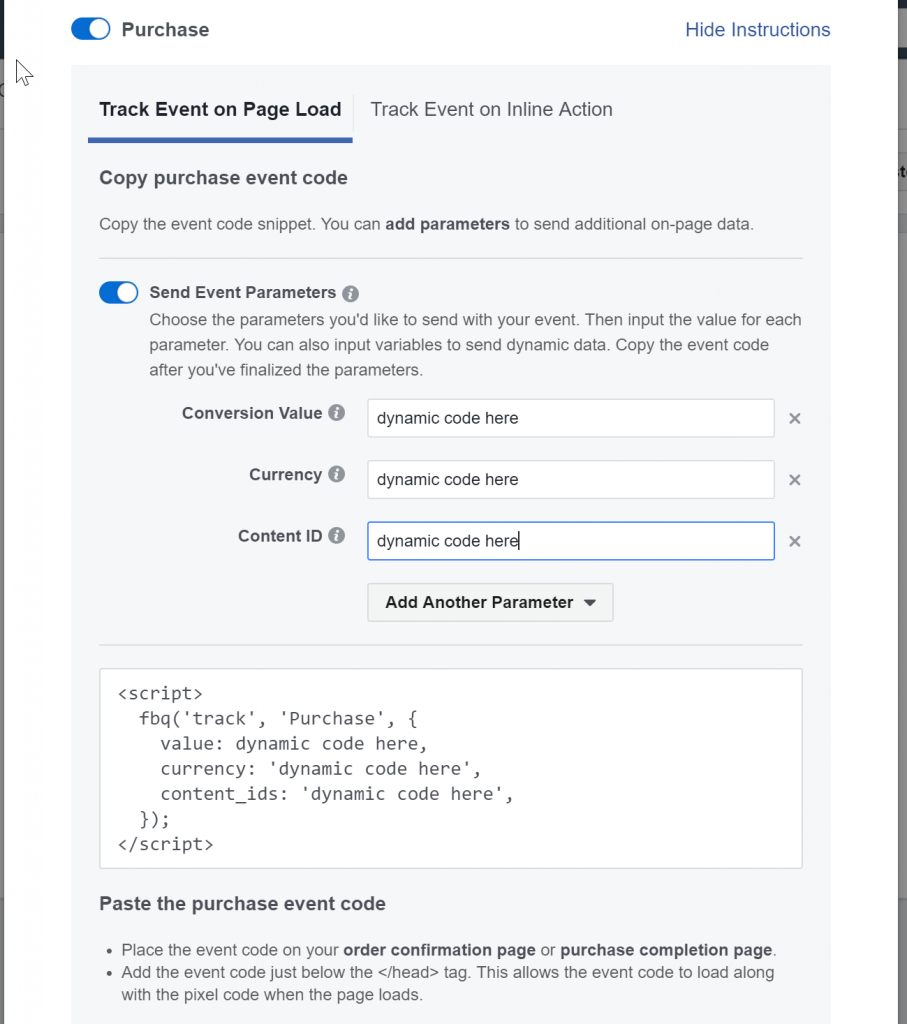
Now that the dynamic variables are defined the code for the purchase event can be added to the confirmation or thank you page.
The easiest way to do this is by creating a custom HTML tag in the GTM. (The same way we set up the Facebook Pixel using Google Tag Manager).
Creating a Custom Event
To create a custom event, copy the code that was used to generate the product event.
Give your conversion a name that clearly defines it.
<script>// Custom Conversion
// You can call the custom conversion anything you want
fbq(‘track’, ‘Trial_Signup’);</script>
Now that the conversion has been defined you can add the code for the purchase event by creating a custom HTML tag that fires when the key action has been taken, i.e., submission using GTM.
Note: Since you will be just starting data collection there won’t be any substantial conversion volume that Facebook can reference to optimize conversion objective campaigns.
To avoid getting stuck in ‘learning’ create a ‘soft conversion’ such as a PageView event.
Then you can temporarily set this as the focus conversion until you have collected enough data.
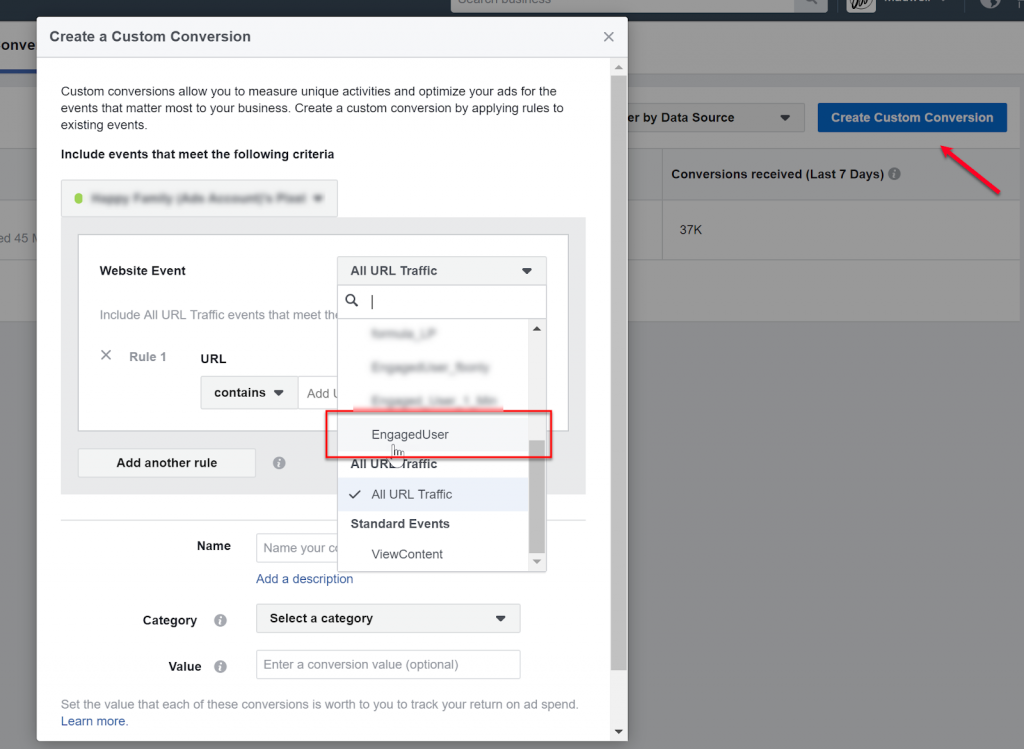
Creating a Custom Conversions (From Your Custom Event)
By default, Facebook does not make a custom event outside of the nine standard events available to leverage as the primary conversion objective.
In order or you to optimize against a custom event, you will need to first create a custom conversion off of a custom event.
Go to Custom Conversions
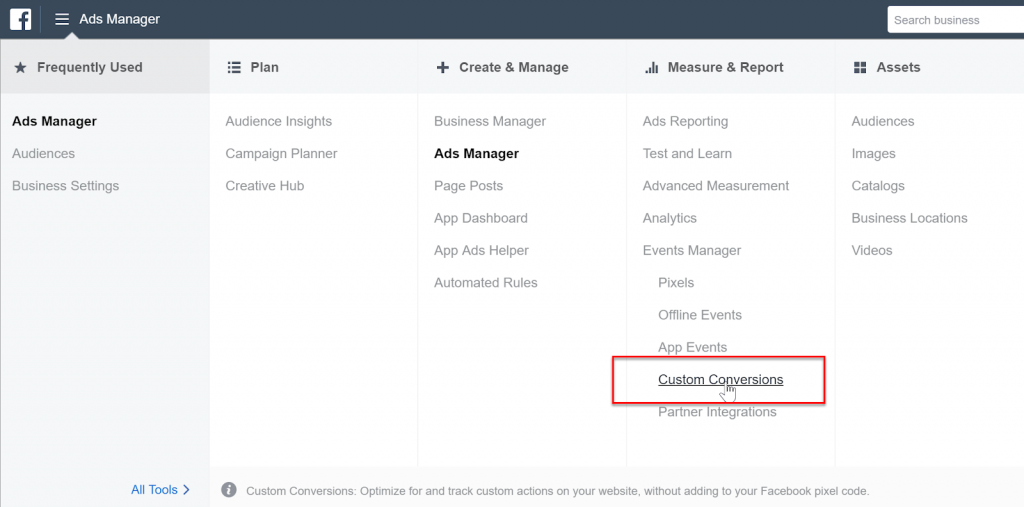
Click create custom conversions and then select the desired custom event.
Conclusion
Now that the set up of the Facebook pixel using Google Tag Manager is complete your value extends much further than merely retargeting.
The Facebook pixel is a versatile people based data collection tool.
This allows you to maximize conversion objectives, expand your audience reach and gain attribution insights directly inside of Facebook.
I want to thank you for this article, with the help of this blog post I got a lot of information about Facebook pixel using a google tag manager. Keep giving us this information.
Thanks so much for this, what happens if you don’t remove the no script tag ? Does it mess with tracking ?
It shouldn’t it just won’t fire in an HTML tag so there is no reason to leave it.